Some reasons for creating a group include:
- Assigning all the IPCs in paddock to a group so that they can be inhibited to prevent watering if the field is being ploughed or sown.
- Assigning IPCs to a group if they are on a hill or in a gulley or beside a road so that the time and amount of irrigation can be managed or specific watering at a time of day can be defined.
- Assigning IPCs to a group so that network communications can be optimised by using mesh, repeater or direct communications.
- Putting part-circle sprinklers in a group to make sure they operate for shorter watering times.
Groups can be made for temporary purposes then deleted. Deleting a group does not delete the IPCs in the group from the site. For example, part of a paddock could be cordoned off for a while for calves and not watered.
Creating a Group:
Creating a group has two main steps: first create a group name or container to hold the IPCs (sprinkler control units), then add IPCs to the group. Later you can edit or remove IPCs from the group or delete the group as a whole.
We’ve provided two methods for adding IPCs: one by selecting them from a list of devices and adding them or a graphical method that allows you to click on individual sprinklers on the map to add them. You can also use the graphical method to draw a shape in an area on the map, it will then capture all the IPCs inside the shape.
The “List” method is particularly good for sprinklers like part circles which may be dotted all over a farm instead of an area. In this case each sprinkler can be selected by its name or serial number then added. The List method is also great if you have created your sprinkler names using a paddock number as a prefix. You can simply type in the first few letters of the sprinkler names and the list will filter on all the matching units which you can select and assign in one go to a group.
The “Map” method is best collecting sprinklers that are in a specific area (such as a paddock). Often paddocks can be seen in the satellite view of the map so that provides an outline that you can draw around.
To create the group name and container click on the button that says groups (next to the one that says farms) on your IMS home page then click on the card that says “new Group” with a large plus symbol in it to add a new group. Laterals are a special kind of group that are only allowed to have one sprinkler on at a time when the schedule is defined for the group. For most groups you make just leave the lateral switch turned off.

Using a Group:
Where ever you see the cog (aka settings) symbol  you will find actions and settings that you can apply. Each group has a cog symbol in the top right corner of the card. There you can modify the members of the group or send schedules or inhibit the group and other actions.

The List Method – adding IPCs to a Group:
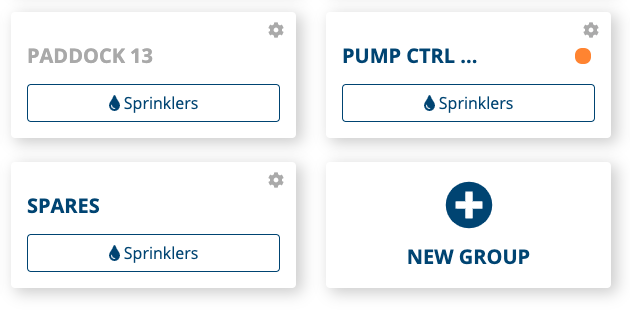
Once the Group name has been created it will appear as a card on the group page (e.g. lateral 1 see figure 1). To add IPCs using the List method click the settings (cog) icon then choose Manage devices (list) from the menu.
This will bring up a list of all your IPCs (figure 3). You can select the members for your group in several ways:
- Click on each IPC on the left-hand side that you want to add to the group, each one will be highlighted.
- Filter the list by typing in the IPC name or serial number that you want to add. If your IPCs have a naming convention (e.g. P19 at the beginning for paddock 19) then filter by typing p19 and it will list only those IPCs with P19 in the name. The click the “select all” checkbox
 to highlight all the IPCs on the left-hand side.
Once you have made your select click the plus symbol to add then to the group. They will then appear on the right-hand side.
If you want to remove items from a group highlight them on the right-hand side (group members) then click the minus symbol to remove them from the group.

Once you are all done click the Home icon or the link to go back to the groups page.
The Map Method – adding IPCs to a Group
Choose Manage Devices (Map) from the group settings menu (figure 2) to choose a graphical method of adding IPCs to a group. This method is best for capturing units in a given area. In this method a satellite image of the farm is shown as well as grey dots representing the sprinklers. (Figure 4)

There are symbols on the page, here is what they mean:
|
| Left end: click to re-centre the map to show the whole farm Middle: Show the satellite view Right: Show a terrain or basic view
|
|
| Left end: Erase all shapes and start again Middle: go back one step in the shape drawing process Right: redo the last step in the shape drawing process
|
|
| Left end: the plus symbol selects all the IPCs in the drawn shape and adds them to the group. Right: the minus symbol selects all the IPCs in the drawn shape and removes them to the group. |


To make a shape simply click on the map at each vertice of the shape. To draw a rectangle, start at one corner and click at each corner. As you click a line will be drawn between the points. Go around in a clockwise fashion (or anti-clockwise if you prefer) but don’t click randomly on corners or a strange shape will emerge. If you get stuck click the eraser icon and start again.
Once you have you shape click the plus symbol to select the IPCs inside the shape and add them to the group.
If you miss a IPC or two just draw small squares around them and add them (click the plus), until you have all your group members.
Conversely if you draw shapes around members of a group then click the minus symbol they will be removed from the group.
Figure 5 |
Figure 6 |


Once you are all done click the Home icon or the link to go back to the groups page.
For more information please email support@waterinsight.co.nz